Our lab currently has 3 rheometers: Anton Paar MCR Physica 302, 301 and 101. These rheometers are routinely used to measure the mechanical properties of our gels and the viscosity of pre-gel solutions and micellar dispersions. Here, we describe the different measuring systems available in the lab and our common methods of preparation. Due to differences in the possible techniques, the 301 and 101 and the 302 have been separated in two different sections.
Anton Paar MCR Physica 301 and 101
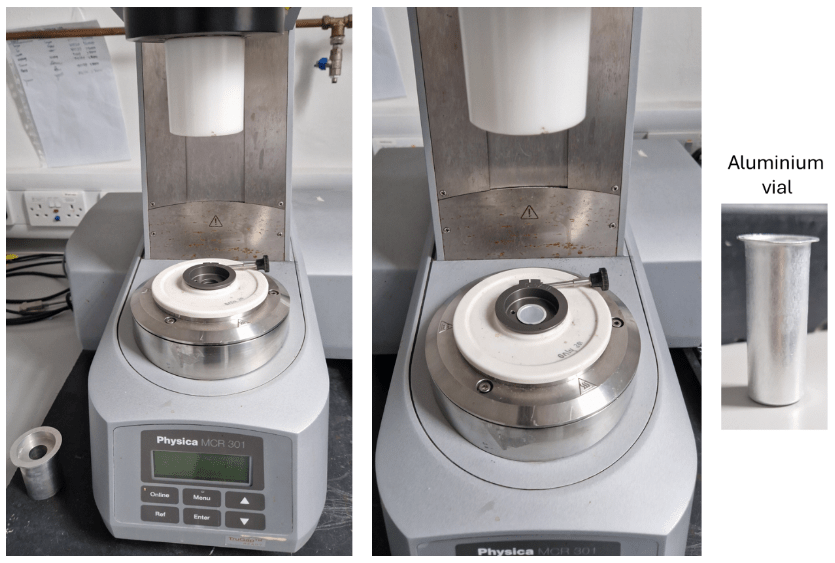
The 301 (left) and 101 (right) can be used with two different measuring cells: flat plate and cup and vane. Note here that the cup measuring cell is exclusive to one of the two rheometers. This is signposted on the cell. Make sure you are using the right one for each rheometer.

Cup and vane
The cup and vane system is routinely used to measure amplitude sweeps and frequency sweeps of our gels as well as gelation time sweeps. The major advantage of this system is that the gel does not have to be transferred to the rheometer and simply measured directly in the vial it has been formed in. The cup and vane fits 7 mL Sterilin vials with no label.
Depending on the size of the gel, the measuring gap can be changed to ensure that the bulk of the material is probed. Routinely, we use a 1.8 mm gap for gels with a final volume of 2 mL.

The cup measuring cell also can be swapped with a cup holder that can host aluminium vials. These can be used for measurements that require different temperatures. The samples can be prepared directly in the aluminium vials and then easily transferred to the rheometer. It is relevant to note that temperature-dependent studies MUST be carried out of the 301.
Flat plate
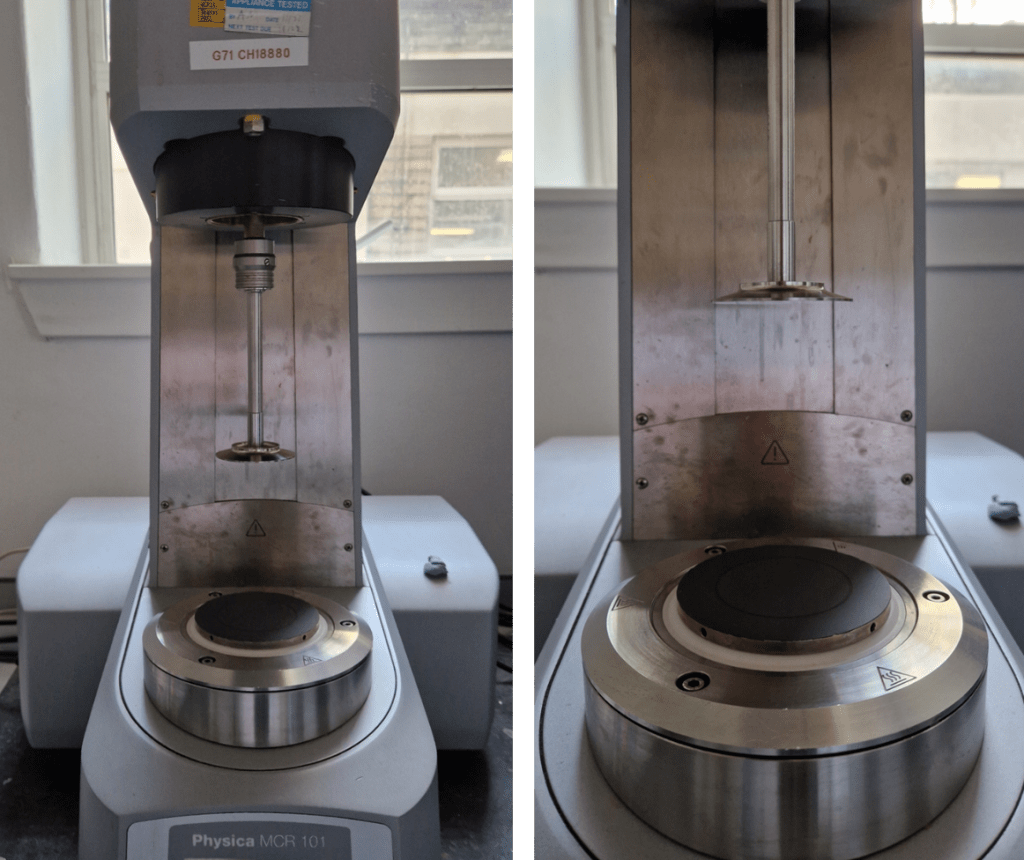
Flat plate can be used to measure both the viscosity of our pre-gel solutions or to measure gels formed within moulds, depending on the measuring system chosen and required information. Different geometries can be used in combination with a flat plate.
Cone-and-plate (CP) geometries (CP25, CP50 or CP75)
These geometries are commonly used to measure the viscosity of pre-gels solutions or micellar dispersions. The cone angle of the CP geometry ensures that an equal shear rate is applied throughout the sample. Due to this, the measuring gap cannot be changed, and it is automatically fixed when using the CP systems. Geometries with different diameters are available and the choice of diameter will often depend on the viscosity of your sample. As a rule of thumb, we generally measure our samples with the CP50 and decide if the measuring geometry needs to be changes based on data quality and noise. Typically, the CP25 is used for more viscous samples, while the CP75 is used for materials with a viscosity similar to water. Make sure that the same geometry is then used throughout all measurements within one set of data.
Parallel-plate (PP) geometries (PP12.5, PP25, PP50. Sandblasted: PP25/S, PP50/S)
Parallel plate geometries are commonly used to measure amplitude sweeps, frequency sweeps of gels and gelation time sweeps. A parallel plate may be required for gels that cannot be formed in vials. Often, in our lab, these gels are prepared inside syringe moulds by cutting off the top part of a syringe (Figure c, below). The gels are allowed to form in here and then gently transferred to sandpaper to measure by slowly releasing the plunger (Figure b, below). The sandpaper is necessary to ensure high adhesion and minimise slip from the gels. This can then be attached to the flat plate either using tape or blu-tac. Depending on the size of the gel or of the mould, PP geometries with different diameters are available. Sanded parallel plate measuring systems are also available (PP/S) to further increase surface contact and reduce slip. When we measure gels formed in moulds, we lower the PP until a Force of around 0.01N or 0.02N is reached to ensure that the surface of the gel is being probed.
In our lab, we also have bespoke 3d-printed measuring cells that are compatible with the flat plate, which allow to measure materials using the PP12.5 geometry in a vial (Figure d, below) or a 24-well plate. Different designs can be made depending on the vessel your gel is formed in.

Anton Paar MCR Physica 302
The 302 rheometer available in our lab has a different measuring cell than the other two rheometers, as the bottom plate is made of quartz glass. Because of this, the 302 rheometer can be used for custom set-ups that require a transparent glass below the sample stage. Due to this, only PP or CP geometries can be used on the 302.
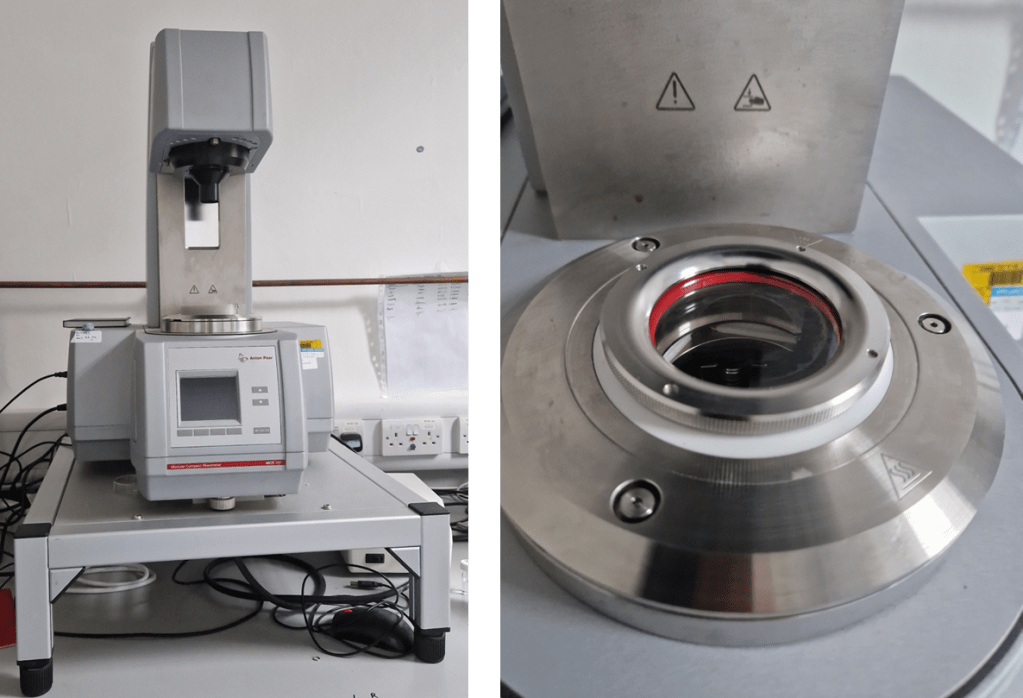
With the quartz plate, we generally run either shear-induced polarise light imaging (SIPLI) or perform rheological measurements under irradiation.
Shear induced polarised light imaging (SIPLI)
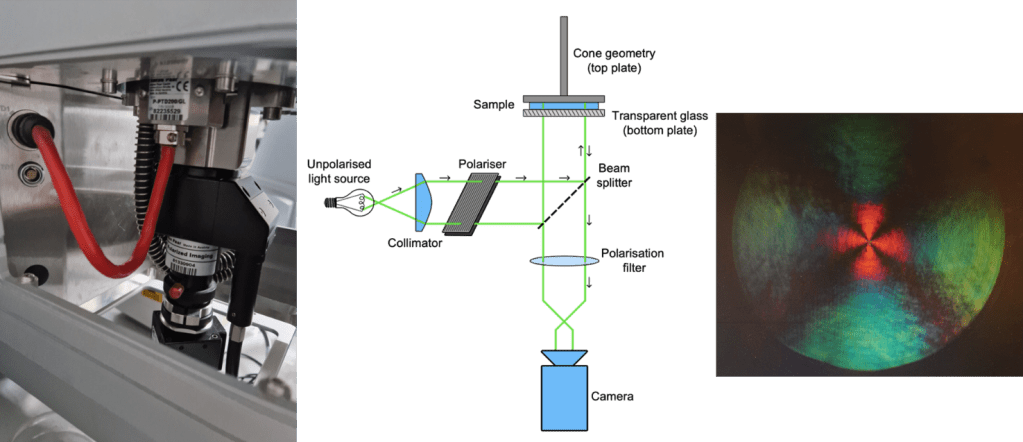
Shear-induced polarised light imaging is performed by employing a set-up consisting of a camera with a cross-polarising filter and a white light source (A picture of the cross-polarising filter and schematic of the set-up are shown below. Schematic drawn by Fin Hallam Stewart, Adams group). By imaging the sample under shear with cross-polarised light, birefringence (local sample orientation) and shear-alignment can be observed. Typically, shear-alignment along the direction of shear is indicated by the presence of a Maltese-cross pattern (Figure below, right).
Rheo-irradiation
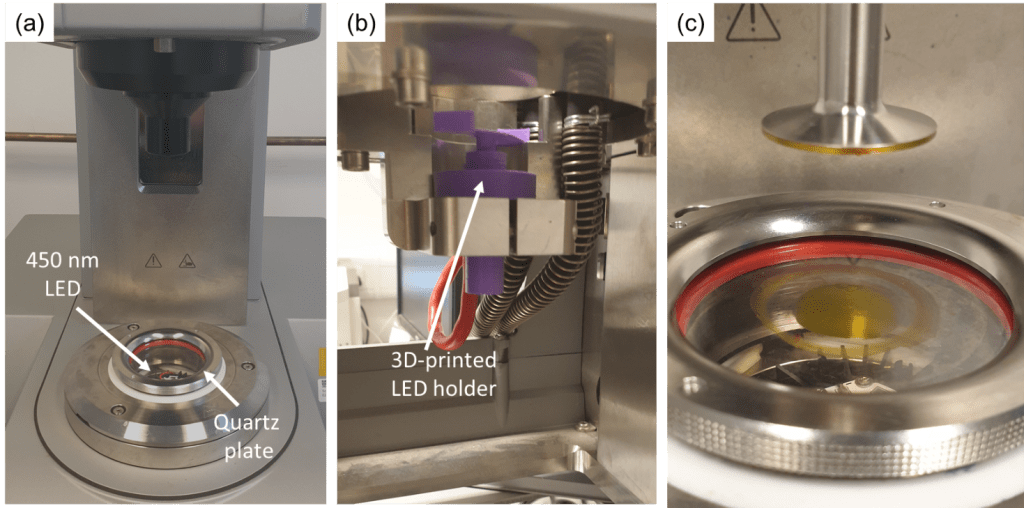
In our lab, a custom set-up to perform rheological measurements under irradiation has been previously designed. This is done thanks to a bespoke 3d-printed holder that can be inserted below the quartz plate (Figure a-b, below). This is in the same position as the camera for SIPLI, which means that the two techniques cannot be run at the same time. The 3d-printed holder is adjustable to allow the user to insert a LED light with a heatsink easily under the glass plate. The height can then be adjusted to the desired sample-to-light distance. The LED light can be controlled externally by using a power supply.
Due to the more complex design of these set-ups, further training is required to use the 302 rheometer. If you are interested in using the equipment, please get in touch with Emily Draper (Emily.Draper@glasgow.ac.uk) or Dave Adams (Dave.Adams@glasgow.ac.uk) who will direct you to the best suited person to help you with your experiment.
If you are part of the Adams or Draper group, please get in touch with Simona Bianco (2266630b@student.gla.ac.uk) or Rebecca Ginesi (2186177g@student.gla.ac.uk). We are trained in mounting the camera and LED set-up and can help you get started with your experiments.
